Razorpay integration in WooCommerce works in six steps: get your Razorpay account approved, install the official plugin, add your API keys in WooCommerce, check that webhooks are active, run a test payment, and then switch to live keys. The plugin is free, and the whole setup usually takes under an hour once your Razorpay account is approved.
Most problems with Razorpay integration in WooCommerce don’t come from the plugin. They come from small things: test keys left on a live store, payments set to “Authorize” without capture, or webhooks that never fired. This guide walks through each step, the settings that matter, and the most common issues.
Table of Contents
What is Razorpay integration in WooCommerce?
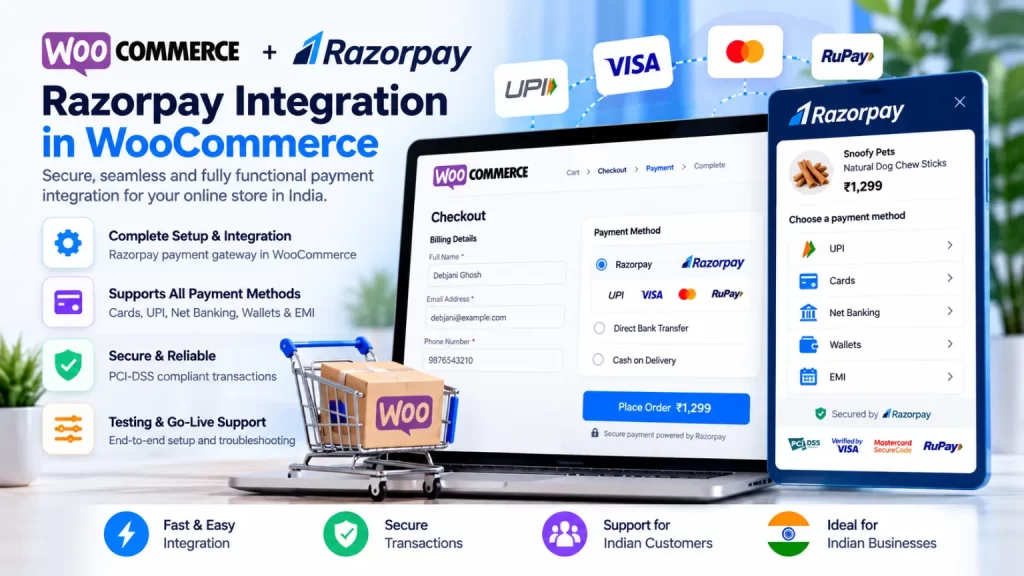
Razorpay integration in WooCommerce connects your online store to the Razorpay payment gateway, so customers can pay at checkout and WooCommerce updates the order automatically. Razorpay publishes an official WooCommerce plugin on WordPress.org for this, and its documentation lists cards, netbanking, UPI, EMI and wallets among the payment methods customers can use. Some methods, such as cardless EMI and pay later, need approval from Razorpay first.
What do you need before you start?
| Requirement | Why it matters |
|---|---|
| A Razorpay account with approved KYC | Live payments won’t work until the account is approved and activated |
| Business activation | Razorpay requires you to activate your business after its activation email |
| API keys from the Razorpay Dashboard | The plugin uses a Key ID and Key Secret to connect to your account |
| A WordPress site with WooCommerce installed | The plugin adds Razorpay as a payment method in WooCommerce |
| HTTPS on your site | Protects customer data during checkout |
| A recent backup | Lets you roll back if something conflicts |
You can generate keys in the Razorpay Dashboard under Account & Settings, then API Keys. Test mode and live mode have separate keys.
How to complete Razorpay integration in WooCommerce: 7 steps
Follow these 7 steps for Razorpay integration in WooCommerce. They follow Razorpay’s official integration guide, so check it for any recent changes.
1. Back up your site
Take a full backup of files and database, and try the setup on a staging copy first if your store is already live.
2. Install the Razorpay plugin
Install the plugin from the WordPress Plugin Directory by searching for “Razorpay for WooCommerce” in Plugins, then Add New. You can also download the latest zip from the Razorpay GitHub releases page and upload it to the plugins folder.
3. Activate the plugin
Go to Plugins in your WordPress dashboard and activate Razorpay.
4. Open the Razorpay payment settings
In WordPress, go to WooCommerce, then Settings, then the Payments (Checkout) tab, and click Razorpay to edit its settings.
5. Enable the method and add your keys
Turn on the payment method and give it a clear title, because this is what customers see at checkout. Then paste your Key ID and Key Secret from the Razorpay Dashboard. Use test keys while testing, and live keys only when you go live.
6. Choose the payment action
Set Payment Action to Authorize and Capture so payments are captured automatically. This matters. Razorpay’s documentation warns that if you only authorize, payments that aren’t captured within 5 days are automatically refunded to the customer, and you receive nothing.
7. Save and check webhooks
When you save your API keys, the plugin automatically sets up webhooks in versions 3.5.0 and later. Razorpay lists these auto-configured events: payment.authorized, payment.captured, payment.failed and order.paid. Open your Razorpay Dashboard, go to Account & Settings, then Webhooks, and confirm they are enabled. If you ever regenerate your API keys, enter and save the new keys in the plugin again so webhooks are set up again.
How do you test Razorpay integration in WooCommerce?
Test before you take real orders. With test mode keys in the plugin, place an order on your store and pay using Razorpay’s test options. No real money moves in test mode.
| Payment method | How to test |
|---|---|
| UPI | Use success@razorpay to pass and failure@razorpay to fail |
| Netbanking | Choose a bank, then pick Success or Failure on the mock page |
| Wallets | Choose a wallet, then pick Success or Failure on the mock page |
| Cards | Use Razorpay’s published test card numbers with any future expiry date and a random CVV |
After a test payment, check three things: the order status in WooCommerce, the payment in the Razorpay Dashboard under Transactions, then Payments (a successful one shows as captured), and the order confirmation email. Test a failed payment too, so you know what your customer sees.
If you’re building a wider checkout setup, our guide on WooCommerce payment gateway integration India covers gateway choice, refunds and order statuses.
Go-live checklist
Before you switch on live payments, go through this list:
- Switch to live keys. Generate live keys in the Razorpay Dashboard in Live Mode and replace the test keys in the plugin.
- Remove test keys completely. A store running test keys cannot take real payments.
- Confirm Authorize and Capture is selected, or that you capture manually before the 5-day window ends.
- Re-check webhooks after saving the live keys.
- Place one small real order and refund it to confirm the whole flow works.
- Test on a phone. Many customers pay with UPI on mobile.
- Keep keys private. Never share the Key Secret or paste it into public tickets.
Common problems and fixes
| Problem | What to try |
|---|---|
| Razorpay doesn’t show at checkout | Update the plugin to the latest version, confirm it is enabled in WooCommerce payment settings and check for theme or checkout plugin conflicts |
| Payment succeeded but the order stays pending | Check that webhooks are active in the Razorpay Dashboard and re-save your API keys |
| Payments are refunded automatically | Your payment action may be set to Authorize only. Switch to Authorize and Capture |
| Webhooks stopped after changing keys | Re-enter and save the new keys in the plugin settings |
| Test payments work but live ones fail | Confirm live keys are entered and the Razorpay account is fully activated |
Razorpay also maintains a WooCommerce troubleshooting and FAQ page for plugin-specific errors.
When should you hire a developer?
The basic setup is simple, but you may want help if your store has custom checkout fields, subscriptions, split payments, multi-vendor payouts or a heavily customised theme. A developer can also handle staging, testing and monitoring so you don’t risk lost orders.
At NJ Technos, a Delhi-based web design and development company working since 2006 with 500+ websites built, we build and customise WooCommerce stores. If a standard plugin isn’t enough, see our guide on custom WooCommerce plugin development India. A fast, secure checkout also matters, so read about WooCommerce speed optimization and WordPress security hardening. For ongoing care, see our website maintenance AMC in India page and our services.
Once payments work, you can also recover lost sales with WooCommerce abandoned cart recovery setup.
Need help with Razorpay on your store?
Tell us about your WooCommerce setup and we’ll recommend a clear plan. Reach us through our contact page, email info@njtechnos.com or call +91 783 830 0319.
FAQs: Razorpay integration in WooCommerce
Add these with the Rank Math FAQ block so FAQPage schema is generated.
How do I do Razorpay integration in WooCommerce?
Install the official Razorpay plugin, activate it, add your Key ID and Key Secret under WooCommerce payment settings, set Payment Action to Authorize and Capture, confirm webhooks, test, and then switch to live keys.
Is the Razorpay WooCommerce plugin free?
The plugin itself is free. Razorpay charges transaction fees based on your plan, so check its current pricing.
Where do I find my Razorpay API keys?
In the Razorpay Dashboard, under Account & Settings, then API Keys. Test and live modes have different keys.
Does Razorpay integration in WooCommerce support UPI?
Yes. Razorpay lists UPI among its supported payment methods, and you can test it in test mode with the success@razorpay and failure@razorpay IDs.
Why is my WooCommerce order pending after a Razorpay payment?
The most common cause is a webhook problem. Check that webhooks are enabled in the Razorpay Dashboard and re-save your API keys in the plugin.
Can I accept recurring payments with Razorpay on WooCommerce?
Razorpay offers a separate Razorpay Subscriptions for WooCommerce plugin, which requires WooCommerce Subscriptions and the Razorpay WooCommerce plugin.
Do you work with clients outside Delhi?
Yes. NJ Technos is based in Delhi and works with clients across India.
Final verdict: Razorpay integration in WooCommerce
Razorpay integration in WooCommerce is straightforward when you follow the order: approved account, official plugin, correct keys, Authorize and Capture, active webhooks, a full test and then live keys. Most issues come from skipped checks, not from the plugin itself.
If you want Razorpay integration in WooCommerce done and tested without risking live orders, NJ Technos has been building and supporting WordPress and WooCommerce websites since 2006.
Let’s set up your payments
Share your store details and we’ll recommend a clear plan. Contact us through our contact page.